Process Piece- How to Brush a Trail

photo credit: Campsite, All Rights Reserved Amanda Burns 2013

This piece was written for an intro to writing class at College of the Atlantic (2015). The assignment was to write a “process piece”, which is basically a how-to guide. I choose to write it about my experience in California and Glacier National Park with the Student Conservation Association. While writing this piece, I was intrigued by the concept- how do I explain how to do something in simple, easy-to-understand language, while also telling a story? Looking back over this piece, I realized that it fits directly into my goal of exploring aspects of communication and story telling and utilizing this to educate and engage others. This is why I included it in this portfolio. It also reminds me that I need to be open to the ways my past projects have shaped my interests now, and explore this more.

INTRO

Waking up in the mornings are the hardest, I know. Especially when you were sleeping on top of rocks and sticks and didn’t think to buy a thicker sleeping pad. You probably would have regretted that anyway though. It would have been much heavier, and your pack is already verging on the edge of manageable. Emerging from your tent, you see the majestic mountains surrounding you and you day doesn’t seem too bad after all.


You remember that today is your first day of trail work, but you have no idea what that will entail. You know that all the tools and safety equipment and maps are provided, and should be in the barn, just a couple of miles away. There is a book you brought with you, which you decide to get out and start to read while eating your instant oatmeal and coffee.


This is what the book said…

First, take out the map. The trail that needs to be brushed should be highlighted. The trails that must be hiked to get there should be mapped out as well.  Before leaving, the proper clothing and safety equipment is required. For brushing a trail, a weed whip, loppers, and possibly grass shears are needed. For clothing, long pants, leather hiking/work boots, long sleeved breathable shirt, as well as a warmer and cooler layer should be carried to the work site. A raincoat and pants should also be easily reachable in your backpack, as well as snacks, water, and food for lunch. Being prepared for all weather conditions is the key to success. Also, do not forget work gloves!


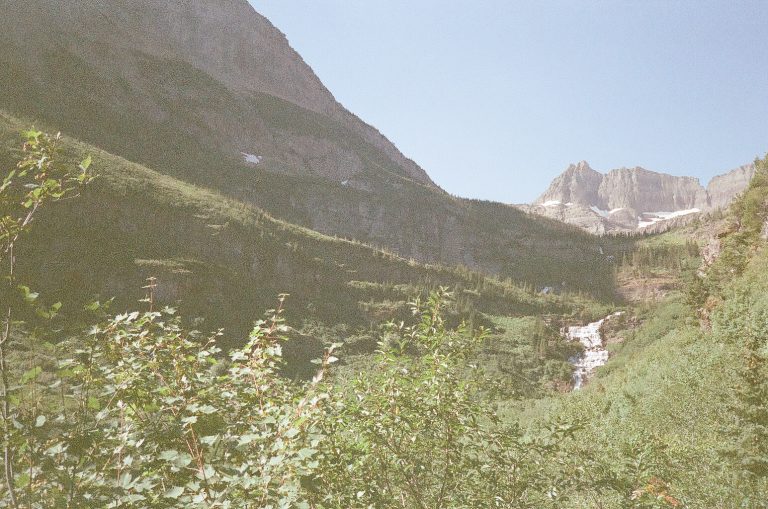
Once the backpack is packed, and tools are in hand, the hike begins. The scenery should be beautiful, so look around and maybe even take some pictures or stop for a nap on the way there.


Once the worksite has been reached, the area must first be surveyed. The tools and pack can be set down in a safe place, but always keep them within eyesight.  Get close to the ground and look on either side of the trail for the length of the brushing site, making sure to pay attention to all rocks, sticks, and other objects that should be moved out of the way before using the weed whip. Also look for small trees or other bushes with thick or tough stalks or branches that the weed whip would not be able to cut through. These should be cut with loppers before beginning to weed whip. Once these objects and plants are out of the way, the weed whip can be used. A weed whip is used like a golf club, swinging at the brush and weeds a foot or two on wither side of the trail. This might take a while, but once it is finished, the trail always looks a thousand percent better. Now, go back to where the work started, and use a rake or hands to scoop up the piles of brush. Make sure to throw them far off the trail. This is mostly for aesthetic reasons, but also for the safety of trail animals, such as donkeys and horses. They tend to get spooked by piles of brush blowing in the wind so close to the trail.


After this is done, take a step back and admire the work that has been done so far. This would be a good time to break for a snack, or depending on how late it is, maybe lunch as well. After the break, there are a couple more cleanup jobs that need to be done before leaving.  The first is going along the trail with the grass shears to trim the grass and weeds a final time. Make sure that when they are cut, only a couple of inches are left close to the ground. This insures that the weeds will not need to be cut down again for a while. As this is happening, check the trail consistently for any left over debris that should be cleared. Once the end is reached once again, with all tools and personal items accounted for, there is only on job left to be done.  

Step back and admire your work once again. Maybe take another nap in the shade, and then begin the long hike back to camp.

  1. Get all tools from the barn or tool shed
  2. Hike to where the trail needs brushing
  3. Survey the area that needs brushing
  4. Look for rocks, sticks, and other little things that could potentially be dangerous
  5. Move them out of the way
  6. Make sure there is no one in your swing range
  7. Grab the weed whip, and practice first
  8. Swing it like you would a golf club
  9. Hold it a little above your ankles, depending on how tall the weeds and brush is
  10. If there are any tiny trees, or tough bushes, you might have to cut them with loppers
  11. Begin to swing and go along the trail on one side, and then the other
  12. Go back to where you started with a rake and rake up all of the big pieces of brush you chopped off that are likely in the middle of the trail
  13. Throw them all far off the trail, for aesthetic reasons
  14. Go back again to the beginning of the trail section and use shears or grass cutters to get within a couple of inches of the ground, while throwing these pile off the trail as you go
  15. Go through the section and make sure all of your tools are accounted for and the trail is clear
  16. Admire your work
  17. Hike back to the camp site and take a nap

California- photos

Montana- Photos


Leave a Reply

Your email address will not be published. Required fields are marked *